
Welcome to our guide on baking with Rhodes Frozen Bread Dough! Discover how this convenient option simplifies creating delicious, homemade-style bread effortlessly․
Overview of Rhodes Frozen Bread Dough
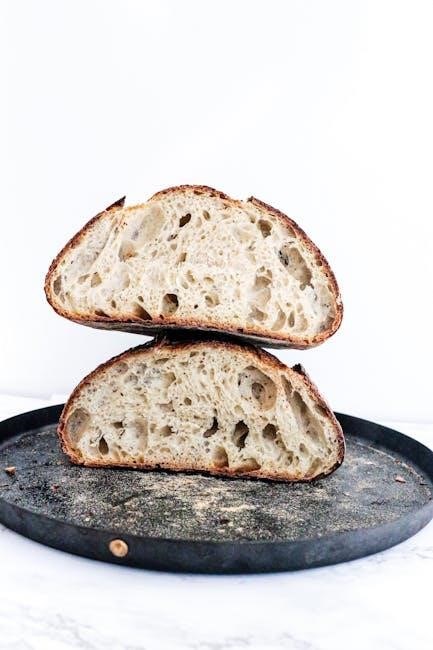
Rhodes Frozen Bread Dough offers a convenient and high-quality solution for homemade bread․ It eliminates the need for scratch preparation, providing a consistent, tender crumb and golden crust․ Perfect for both novice bakers and experienced cooks, this dough is versatile for creating traditional loaves, rolls, or even sweet treats like monkey bread․ With no preservatives or trans fat, it aligns with health-conscious preferences․ Its ease of use and reliable results make it a favorite for achieving bakery-worthy bread at home․ Simply thaw, let rise, and bake for fresh, delicious bread tailored to any meal or occasion․
Convenience and Benefits of Using Frozen Dough
Using Rhodes Frozen Bread Dough offers unparalleled convenience, saving time without compromising quality․ It eliminates the need for tedious dough preparation, allowing you to focus on baking․ The dough thaws quickly and rises reliably, ensuring consistent results․ Perfect for busy schedules, it can be prepared ahead of time and baked fresh when needed․ Its pre-portioned loaves reduce waste and offer flexibility for various recipes․ With no preservatives or trans fat, it’s a healthy alternative to store-bought bread․ The dough’s versatility makes it ideal for creating loaves, rolls, or even sweet treats, ensuring delicious, homemade bread with minimal effort․
Materials Needed for Baking
Essential supplies include a loaf pan (8 1/2 x 4 1/2 x 2 1/2 inches), cooking spray, plastic wrap, and an oven preheated to 350°F․ A wire rack is also needed for cooling․

Essential Baking Supplies
To bake Rhodes Frozen Bread Dough, you’ll need a few key items․ Start with a loaf pan, ideally sized at 8 1/2 x 4 1/2 x 2 1/2 inches for a standard loaf․ Cooking spray is necessary to grease the pan and prevent sticking․ Plastic wrap, also sprayed with cooking spray, will cover the dough during rising to avoid sticking․ Preheat your oven to 350°F for baking․ A wire rack is essential for cooling the bread after baking to ensure it doesn’t become soggy․ These simple tools and preparations will help you achieve perfectly baked bread every time․
Recommended Loaf Pan Size
The ideal loaf pan for baking Rhodes Frozen Bread Dough measures 8 1/2 x 4 1/2 x 2 1/2 inches, perfect for a 1-pound loaf․ This size ensures even rising and baking, producing a well-shaped loaf with a golden crust․ Using the correct pan size is crucial to achieve the desired texture and structure of the bread․ If your pan is smaller, the dough may overflow during rising, while a larger pan could result in a flatter loaf․ Always follow the recommended size for consistent and professional-looking results when baking with Rhodes dough․
Step-by-Step Baking Process
Transform Rhodes Frozen Bread Dough into golden perfection with a simple, step-by-step approach․ From thawing to baking, this guide ensures a flawless process for homemade-style bread․
Thawing the Frozen Dough
Begin by thawing the frozen dough in a loaf pan․ Spray the pan with cooking spray to prevent sticking․ Place the frozen dough in the pan, cover it with plastic wrap sprayed with cooking spray, and let it thaw at room temperature․ Allow 4-7 hours for the dough to rise until it reaches about 1 inch above the top of the pan․ This step is crucial for achieving the right texture and volume in your final loaf; Ensure the dough is in a warm, draft-free area to facilitate even rising․ Once fully risen, the dough is ready to be baked into delicious homemade-style bread․
Letting the Dough Rise
After thawing, the dough needs time to rise․ Place the dough in a greased loaf pan, cover it with sprayed plastic wrap, and let it rise in a warm, draft-free area․ Allow 4 to 7 hours for the dough to double in size, reaching about 1 inch above the pan’s rim․ This step is essential for developing the bread’s texture and volume․ Monitor the dough to ensure it doesn’t over-rise, as this can lead to a dense loaf․ Once the dough has fully risen, it is ready to be baked into a delicious, homemade-style bread․ Patience is key for achieving the perfect rise․
Shaping the Dough into a Loaf
After the dough has risen, gently punch it down to release any air bubbles․ Place the dough on a lightly floured surface and shape it into a rectangular form, ensuring even thickness․ Fold the dough under itself, tucking the ends to create a smooth, compact loaf․ Carefully transfer the shaped dough to a greased loaf pan, pressing it gently into the corners․ Make sure the top is even for consistent baking․ Avoid overworking the dough to maintain its light texture․ Once shaped, the dough is ready to be baked into a delicious, homemade-style loaf․ Handle the dough gently to preserve its structure․
Baking the Dough
Preheat your oven to 350°F (175°C)․ Place the shaped loaf pan in the center of the oven to ensure even cooking․ Bake for 20-25 minutes, or until the bread is golden brown on top and sounds hollow when tapped․ Avoid opening the oven door too early, as this can cause the bread to sink․ After baking, remove the loaf from the oven and let it cool in the pan for 5-10 minutes․ Transfer the bread to a wire rack to cool completely before slicing․ This step ensures the bread develops a crisp crust and a soft interior without overcooking․ Proper baking yields a perfectly golden-brown loaf every time․
Cooling the Baked Bread
Once baked, remove the bread from the oven and carefully transfer it to a wire rack to cool․ Avoid slicing the bread immediately, as it may tear or appear doughy․ Letting it cool on its side helps prevent the bottom from becoming soggy․ Brush the top with melted butter if desired for extra flavor and a golden finish․ Allow the bread to cool for at least 10-15 minutes before slicing․ Proper cooling ensures the bread retains its texture and flavor․ For best results, let the bread cool completely before storing it in an airtight container․ This step is crucial for achieving a crisp crust and a soft interior․
Optional Enhancements
Enhance your bread with a brush of melted butter for a golden, buttery crust․ Alternatively, add flavor with herbs, cheese, or seeds before baking for extra taste․
Brushing with Melted Butter
Brushing your baked bread with melted butter is a simple yet delicious enhancement․ After baking, remove the bread from the oven and gently brush the top with melted butter using a pastry brush․ This step adds a golden, buttery crust and enhances the bread’s flavor․ For an extra touch, you can also brush the bread with butter before baking for a richer texture․ This optional step is quick and easy, perfect for those wanting to elevate their homemade bread to the next level․ It’s a great way to add a personal finishing touch to your freshly baked loaf․
Adding Flavor or Toppings
Add a personal touch to your Rhodes Frozen Bread Dough by incorporating flavorful toppings or mix-ins․ Before baking, try sprinkling herbs like rosemary or garlic powder, or add a pinch of sea salt for extra flavor․ For a cheesy twist, sprinkle shredded cheese on top․ You can also mix in dried herbs, spices, or even seeds like sesame or poppy for texture․ Ensure toppings are evenly distributed and lightly pressed into the dough to adhere during baking․ Experiment with combinations to create unique flavor profiles, such as garlic and parmesan or cinnamon sugar for a sweet variation․ This step allows for endless creativity, making each loaf truly customizable․ Always preheat and bake as instructed for the best results․ Let your imagination guide you to craft delicious, personalized bread every time!

Important Tips and Reminders
Always follow package instructions for thawing and baking times․ Ensure oven temperature is accurate for proper baking․ Avoid overworking dough to maintain texture․ Let bread cool completely before slicing for best results․ Store leftovers in an airtight container to preserve freshness․ Keep dough frozen until ready to use․ These simple tips ensure perfect, delicious bread every time! Use caution when handling hot pans and freshly baked bread to prevent burns․ Never refreeze thawed dough․ Follow safety guidelines carefully for optimal outcomes․ Happy baking!
Pro Tips for Perfect Results
For flawless baking with Rhodes Frozen Bread Dough, ensure your pan is evenly coated with cooking spray to prevent sticking; Place dough gently to avoid stretching or tearing․ For rolls, arrange them with space to allow even rising․ Preheat your oven to the precise temperature, as this ensures consistent baking․ Avoid overcrowding the pan, as this can hinder proper expansion․Brush melted butter immediately after baking for a golden, shiny crust․ Let the bread cool slightly before slicing to maintain its texture․ Always follow the recommended baking time and temperature for your specific dough type․ These pro tips will elevate your baking game and ensure perfectly baked bread every time!
Safety Precautions
When working with Rhodes Frozen Bread Dough, ensure all surfaces and utensils are clean․ Always wash your hands before handling the dough․ Keep children away from hot ovens and sharp objects․ Never leave baking unattended, as ovens can cause fires if mishandled․ Use oven mitts to handle hot pans and bread․ Avoid touching hot surfaces or baked bread immediately after removal from the oven․ Ensure the dough is fully baked to an internal temperature of 190°F to 200°F to avoid consuming raw dough․ Always follow the package instructions for thawing and baking to guarantee a safe and enjoyable baking experience․
Rhodes Frozen Bread Dough offers a convenient shortcut to homemade perfection, allowing customization and yielding delicious results every time for a satisfying baking experience․
Final Thoughts on Baking with Rhodes Dough
Baking with Rhodes Frozen Bread Dough is a simple yet rewarding process that yields professional-quality results․ The dough’s versatility allows for endless creativity, from classic loaves to intricate pastries․ Perfect for both novice bakers and experienced cooks, Rhodes dough ensures consistent outcomes with minimal effort․ Whether you’re preparing a family dinner or experimenting with new recipes, this convenient option streamlines the baking process, making it easy to enjoy freshly baked goods without compromising on taste or texture․ Embrace the convenience and unlock your baking potential with Rhodes Frozen Bread Dough!
Exploring Other Recipes with Rhodes Dough
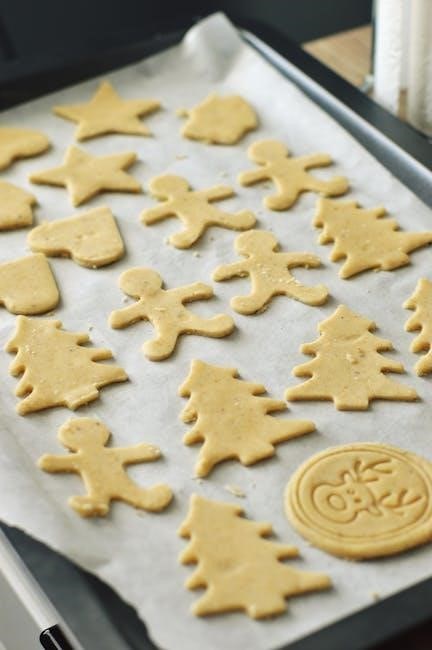
Rhodes Frozen Bread Dough is incredibly versatile, allowing you to create a variety of delicious treats beyond traditional bread․ Consider making monkey bread for a sweet surprise or cinnamon rolls for a tasty breakfast․ You could also craft pretzel bites for a fun snack․ Customize your creations by adding herbs, cheese, or other toppings to suit your taste․ With Rhodes dough, the possibilities are endless, making it a fantastic addition to any baker’s repertoire․ Whether you’re experimenting with new flavors or sticking to classic recipes, Rhodes dough simplifies the process, ensuring every dish turns out perfectly․ Get creative and enjoy the convenience of homemade perfection!