
A chainsaw sawmill is a portable‚ cost-effective tool for turning logs into lumber. This guide provides a comprehensive overview of the process‚ equipment‚ and safety tips to help you master chainsaw milling.
What is a Chainsaw Sawmill?
A chainsaw sawmill is a portable‚ DIY-friendly tool designed to convert logs into lumber using a chainsaw. It consists of a metal frame or guide system attached to the chainsaw‚ enabling precise‚ even cuts. This setup allows users to mill wood on-site without the need for expensive or bulky machinery. Popular among hobbyists and small-scale woodworkers‚ chainsaw sawmills are ideal for processing firewood‚ creating planks‚ or crafting custom timber. Their portability and affordability make them a practical choice for those looking to mill lumber at home or in remote locations. This tool is perfect for turning logs into usable lumber efficiently.
Benefits of Using a Chainsaw Sawmill
Using a chainsaw sawmill offers numerous advantages for woodworkers and DIY enthusiasts. It provides a cost-effective solution for milling lumber‚ eliminating the need for expensive industrial equipment. Portability is another key benefit‚ allowing users to mill wood on-site or in remote locations. Additionally‚ chainsaw sawmills are ideal for small-scale projects‚ enabling precise control over the thickness and quality of the lumber. They also promote sustainability by utilizing entire logs‚ reducing waste. This tool is perfect for hobbyists‚ homeowners‚ and professionals seeking to create custom wood products efficiently and affordably. Its versatility and ease of use make it a valuable addition to any woodworking arsenal.
Step-by-Step Guide to Chainsaw Milling
Master the process of turning logs into lumber with this detailed guide. Follow structured steps to ensure precision‚ safety‚ and efficiency in milling.
Step 1: Measure and Cut
Begin by assessing the log’s dimensions and desired lumber thickness. Use a tape measure to mark the cutting area‚ ensuring accuracy for the first cut. Secure the log firmly to prevent movement. Attach guide rails to create a stable surface for the chainsaw mill. Double-check the chainsaw’s settings‚ such as chain tension and bar alignment. Make the initial cut slowly and steadily‚ maintaining consistent pressure. This step sets the foundation for subsequent milling‚ so precision is crucial. Proper measurement and cutting ensure smooth progression through the milling process and high-quality lumber production. Safety and attention to detail are key in this foundational step.
Step 2: Mill Posts
After the initial cut‚ the next step is milling posts‚ which involves creating vertical cuts to form the desired post dimensions. Use the guide rails to ensure stability and alignment. Position the chainsaw mill according to the marked measurements‚ maintaining steady control. Make precise‚ vertical cuts along the length of the log‚ following the established guide rails. Repeat this process for each post‚ ensuring uniformity in size and shape. Safety is paramount‚ so keep your hands clear of the blade and wear protective gear. Proper alignment and consistent pressure will yield clean‚ professional-looking posts. This step requires patience and attention to detail to achieve accurate results.
Step 3: Mill Guide Bed
Milling the guide bed is a critical step that ensures accurate and consistent cuts. Start by preparing the log surface‚ ensuring it is flat and free from debris. Attach the guide rails securely‚ using clamps or brackets to maintain proper alignment. The guide bed serves as the foundation for the milling process‚ allowing the chainsaw to move smoothly along the length of the log. Double-check the alignment and tighten all components before proceeding. Consistent pressure and steady movement are key to achieving professional results. Always wear protective gear and follow safety guidelines to avoid accidents during this step.
Step 4: Attach Mill to Chainsaw
Attaching the mill to your chainsaw is a straightforward process that requires precision. Begin by aligning the mill’s attachment points with the chainsaw’s bar and ensuring proper fitment. Secure the mill using the provided hardware‚ tightening all bolts firmly to prevent movement during operation. Double-check the alignment to ensure the mill guides are parallel with the chainsaw bar. A stable and secure connection is essential for maintaining control and achieving accurate cuts. Once attached‚ test the setup by making a small‚ controlled cut to verify proper function. Always wear protective gear and ensure the chainsaw is properly tuned before proceeding.
Step 5: Preview of Milling Instructions
This step involves reviewing the milling process to ensure accuracy and safety. Begin by confirming the guide rails are securely attached and properly aligned with the log. Check the chainsaw’s tension and sharpness‚ as a dull chain can lead to uneven cuts. Ensure the sled or milling attachment is firmly connected to the chainsaw and that all bolts are tightened. Review the planned cuts and measure the desired thickness of the lumber. Always wear protective gear‚ including gloves‚ safety glasses‚ and ear protection‚ before starting. Finally‚ double-check the log’s stability and surroundings to avoid obstacles. This preview ensures a smooth milling experience.
Necessary Equipment for Chainsaw Milling
Chainsaw milling requires specific equipment for safety and efficiency. A powerful chainsaw‚ sturdy guide rails‚ and a support frame are essential. Additional tools include sharpening kits and protective gear.
Chainsaw Requirements
A chainsaw with a minimum of 70cc engine power is recommended for milling‚ as smaller engines may struggle and wear out faster. The chainsaw should have a bar length of 30-42 inches for efficient cutting. A ripping chain‚ designed for cutting parallel to the wood grain‚ is essential for smooth lumber production. Ensure the chainsaw is in excellent condition‚ with regular maintenance‚ including chain sharpening and proper tensioning. Using a high-quality chainsaw will improve both productivity and safety during the milling process. Always follow manufacturer guidelines for optimal performance and longevity of the equipment.
Guide Rails and Support Systems
Guide rails and support systems are crucial for maintaining accuracy and stability during the milling process. They ensure the chainsaw moves smoothly along the cut‚ producing consistent lumber thickness. The guide rail typically attaches to the log or a previously cut surface‚ referencing the last cut to achieve the desired thickness. A sturdy support system‚ such as a frame or stand‚ helps keep the setup aligned and secure. Properly setting up these components is essential for safety and precision. They prevent the chainsaw from veering off course‚ ensuring straight‚ even cuts. Investing in durable guide rails and supports enhances both the quality and efficiency of milling projects.
Additional Accessories
Additional accessories can enhance the efficiency and safety of your chainsaw milling projects; Sharpening tools‚ such as chain sharpeners‚ are essential for maintaining cutting performance. Carrying cases protect your equipment during transport. Log clamps and stabilizers help secure the log‚ reducing movement during milling. A dust collection system minimizes debris‚ improving visibility. Optional accessories like laser guides can aid in precise cuts. Extra chains and bars ensure you’re prepared for extended projects. These accessories may not be mandatory but can significantly improve your milling experience‚ offering convenience‚ safety‚ and better results. Investing in quality accessories is a wise decision for serious millers.
Safety Precautions and Tips
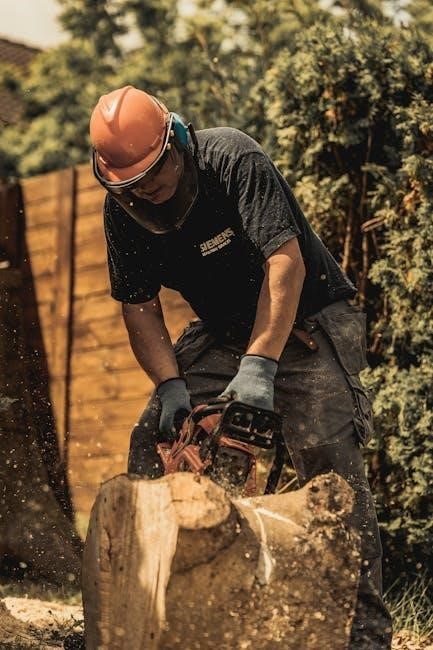
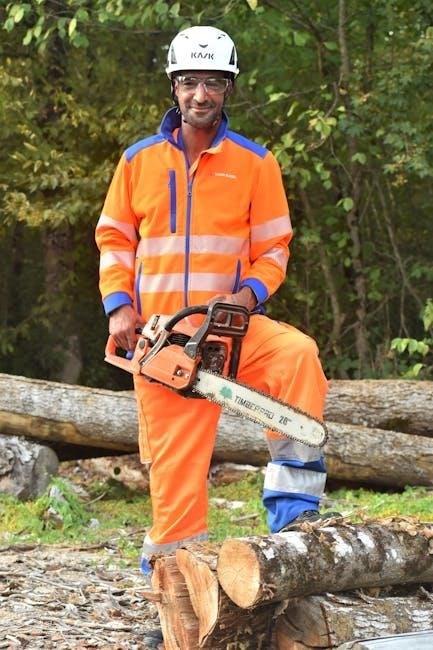
Wear protective gear‚ including helmets‚ safety glasses‚ gloves‚ and sturdy boots. Ensure a clean workspace‚ keep bystanders away‚ and follow manufacturer guidelines. Plan cuts carefully and maintain focus.
Protective Gear
Protective gear is essential for safe chainsaw milling. Always wear a helmet with a face shield or safety glasses to protect your eyes and head from flying debris. Ear protection is crucial to prevent hearing damage from the saw’s noise. Durable gloves provide grip and hand protection‚ while steel-toe boots safeguard your feet from heavy logs. A long-sleeved shirt and pants help prevent cuts from sawdust and debris. Consider a face mask to avoid inhaling sawdust. Ensuring proper gear reduces injury risks and enhances focus during milling. Safety should never be compromised when working with power tools and heavy materials.
Best Practices for Safe Milling
Plan your cuts carefully to avoid obstacles and ensure stability. Always inspect equipment before use‚ ensuring sharp chains and secure attachments. Maintain a firm stance and keep bystanders at a safe distance. Use guide rails for accuracy and control‚ especially for initial cuts. Clear the workspace of debris to prevent tripping hazards. Avoid overreaching or leaning over the saw‚ as this can lead to loss of control. Keep the chainsaw mill well-lubricated and free from dust buildup. Plan the milling process from start to finish to maintain consistent results and minimize risks. Safety and efficiency go hand in hand in chainsaw milling.
A chainsaw sawmill guide offers a portable and cost-effective way to turn logs into lumber. Always prioritize safety‚ use proper equipment‚ and plan carefully for best results.
A chainsaw sawmill guide provides a detailed approach to converting logs into usable lumber. It emphasizes the importance of proper equipment‚ including a powerful chainsaw‚ guide rails‚ and support systems. The process involves precise measuring‚ cutting‚ and milling steps to achieve desired results. Safety is paramount‚ with protective gear and best practices essential for injury prevention. By following the outlined steps and tips‚ beginners can successfully mill lumber‚ creating beautiful and functional projects. This guide serves as a valuable resource for anyone looking to master the art of chainsaw milling efficiently and safely.
Encouragement for Beginners
Starting with chainsaw milling can seem daunting‚ but with patience and practice‚ anyone can master this skill. Begin by following the guide closely and experimenting with small projects to build confidence. Remember‚ it’s okay to make mistakes—each one is a learning opportunity. Start with smaller logs to get a feel for the process before tackling larger ones. Celebrate your progress‚ no matter how small‚ and enjoy the satisfaction of creating something with your own hands. With time and dedication‚ you’ll become proficient in turning raw logs into beautiful‚ usable lumber. Don’t hesitate to dive in and embrace the creative journey of chainsaw milling!

Additional Resources
Explore free DIY chainsaw mill plans online‚ find inspiration for projects‚ and visit websites like Mazay DIY for detailed guides and creative ideas to enhance your milling skills.
Free Plans for DIY Chainsaw Mills
Find detailed free plans online to build your own DIY chainsaw mill‚ such as the popular mini chainsaw mill plans from Mazay DIY. These plans often include step-by-step instructions‚ material lists‚ and diagrams to guide you through the construction process. Many creators share their designs openly‚ allowing you to customize the mill to suit your needs. Websites like Pinterest and YouTube offer a wealth of inspiration and tutorials. With these resources‚ you can create a functional chainsaw mill without breaking the bank. Perfect for woodworking enthusiasts‚ these plans empower you to start milling lumber at home with minimal investment.
Inspiration and Projects
Discover inspiring projects to transform logs into beautiful lumber using a chainsaw mill. From crafting custom furniture to creating decorative wood slabs‚ the possibilities are endless. Explore tutorials on platforms like YouTube and Pinterest for creative ideas. Learn how to slab logs for live-edge tables‚ shelves‚ or wall art. DIY enthusiasts share their journeys‚ showcasing how to turn trees into functional pieces. Whether you’re a beginner or an experienced woodworker‚ these projects offer a rewarding way to repurpose natural materials. Get inspired by the versatility of chainsaw milling and start your next woodworking adventure with confidence and creativity.